Setup and Securing Winlogbeat
Winlogbeat is a lightweight open-source Windows agent that uses the Windows API to ship different event logs to Logstash or Elasticsearch. I have been a Splunk user for quite some time, but I have started to also leverage the Elastic Stack at work and in my home lab. This post is for my reference and anyone trying to configure winlogbeat as securely as possible.
Download and install winlogbeat on a Windows endpoint. I would try to keep the same version of winlogbeat as the rest of the Elastic Stack running in your environment. For instance, if your Logstash or Elasticsearch is version 7.16 then make sure you download version 7.16 of winlogbeat.
This blog post will cover version 8.0 of Winlogbeat using TLS communication and keystore variables.
Create Winlogbeat Roles
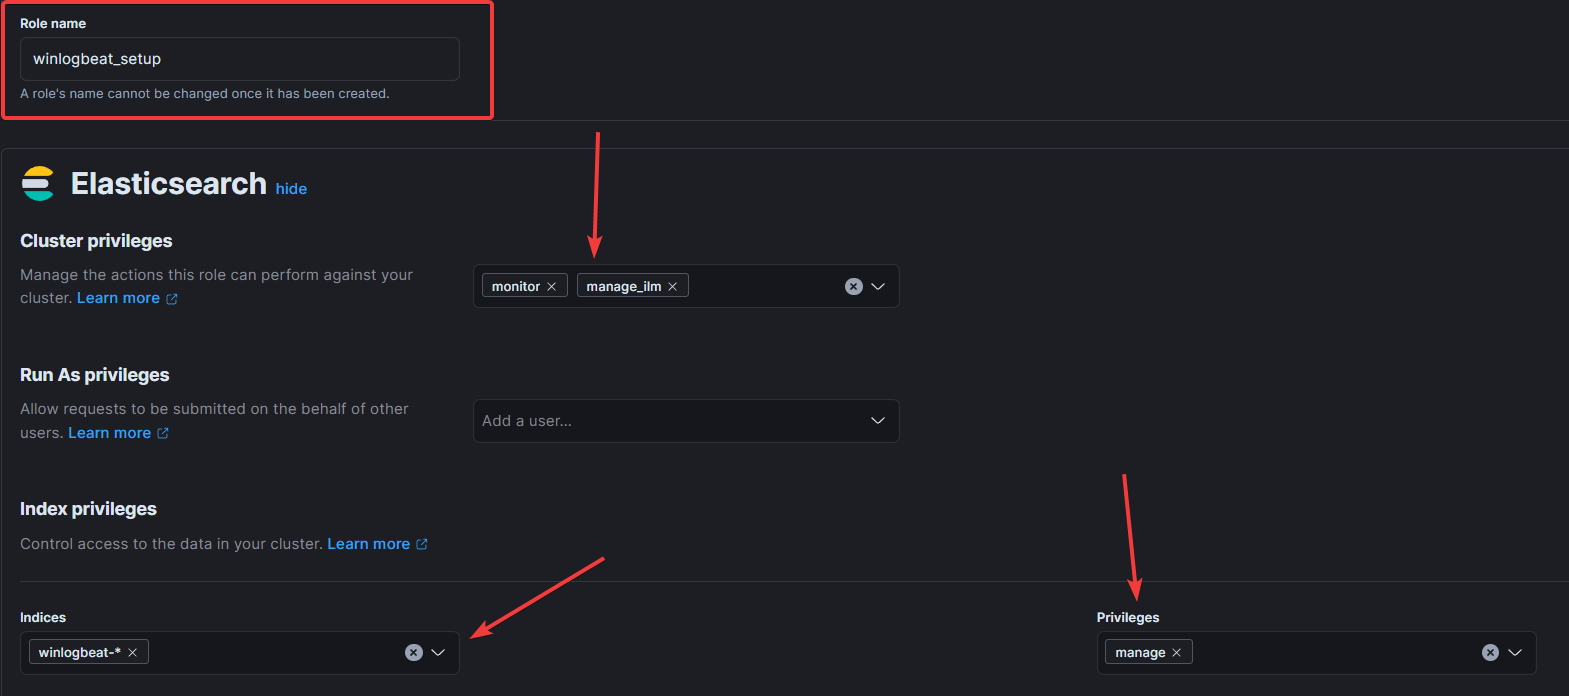
Shipping logs from endpoints directly to Elasticsearch is the least secure deployment design and becomes problematic when you scale the number of client connections communicating with your cluster. Ideally, we would have our endpoints ship their logs to a broker such as Logstash, and then only the broker has access to the cluster. If you have to ship directly to elasticsearch, you need to limit the permissions of winlogbeat on the endpoint using the principle of least privilege (PoLP). Login to Kibana with an admin account and navigate to Stack Management > Roles, and create the role that will perform the privileged winlogbeat setup functions. I will talk more about the winlogbeat setup later.
The cluster privileges for the winlogbeat_setup role should be:
- monitor
- manage_ilm
The privileges for the default winlogbeat index should be:
- manage
Remember, the logs will rotate based on the index lifecycle management (ILM) policy, so you should avoid using an exact index name unless you know what you are doing.
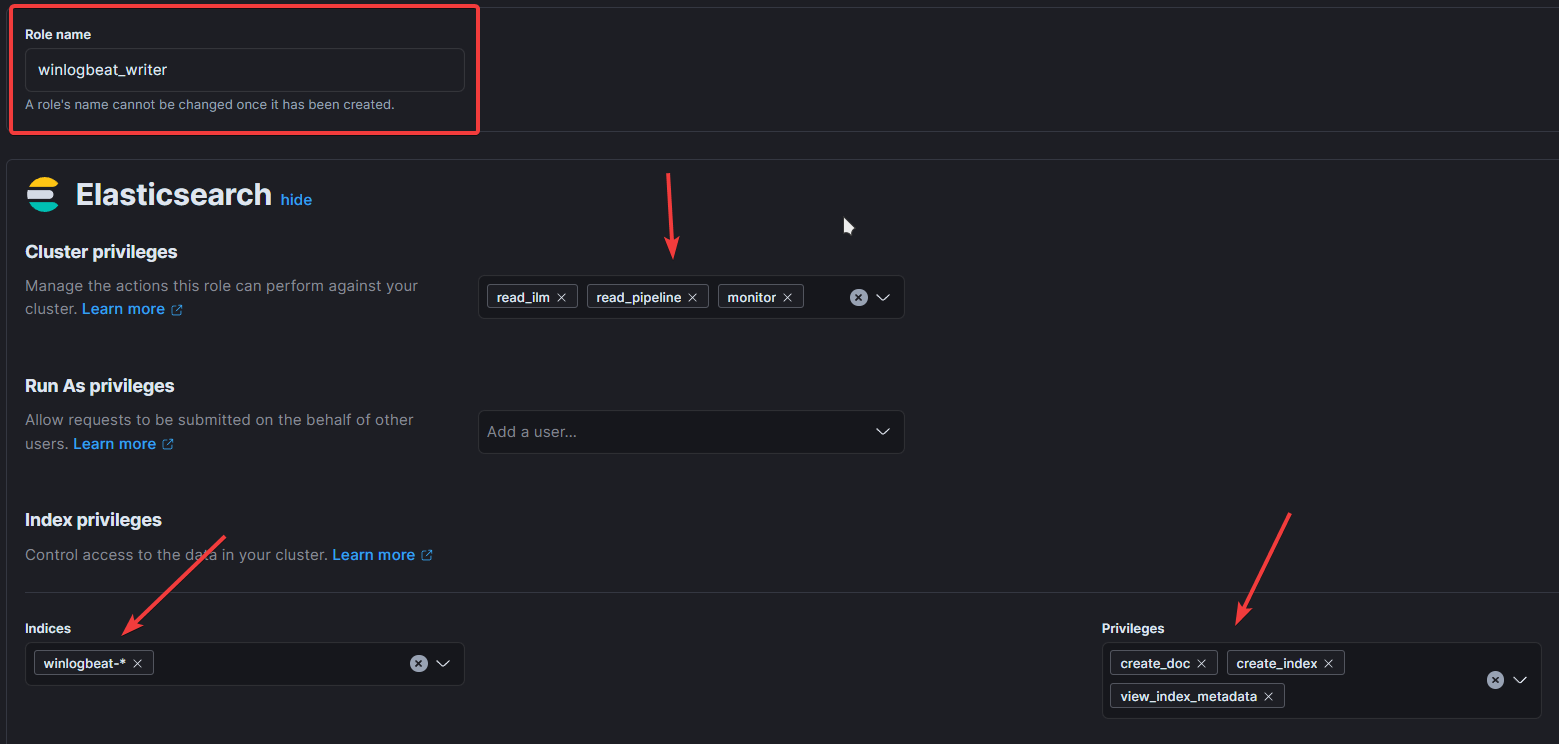
Next, create the role that will be assigned to the API key(s) for your endpoints. The cluster privileges for the winlogbeat_writer role should be:
- read_ilm
- read_pipeline
- monitor
The index privileges should be:
- create_doc
- create_index
- view_index_metadata
Create Endpoint API Key(s)
The best practice approach is to create an API key per winlogbeat host since exposure means only one key has to be expired or recreated. While it might be tempting to create one key and use it everywhere, imagine using one API key for 10,000 endpoints, and now you have to change them all. That’s a very disruptive process, even if you use an automation tool.
The Elastic documentation provides an excellent template to generate API keys and associate them with the target system. I modified it a bit to use it from the CLI and use HTTPS. You can also use Kibana Dev tools and avoid messing with CA certificates and credential management.
The shell script:
#!/bin/sh

export CURL_CA_BUNDLE='elasticstack/ca/ca.crt'
PASSWD="ELASTIC_USER_PASSWD"

curl -u elastic:$PASSWD \
     -X POST "https://localhost:9200/_security/api_key?pretty" \
     -H 'Content-Type: application/json' -d'
{
  "name": "endpoint-1",
  "role_descriptors": {
    "winlogbeat_writer": {
      "cluster": ["monitor", "read_ilm", "read_pipeline"],
      "index": [
        {
          "names": ["winlogbeat-*"],
          "privileges": ["view_index_metadata", "create_doc", "create_index"]
        }
      ]
    }
  }
}
'If you would rather interact with the REST API using Kibana Dev Tools then use the version below. Change the name and role to match your environment:
POST /_security/api_key
{
  "name": "endpoint-1",
  "role_descriptors": {
    "winlogbeat_writer": {
      "cluster": ["monitor", "read_ilm", "read_pipeline"],
      "index": [
        {
          "names": ["winlogbeat-*"],
          "privileges": ["view_index_metadata", "create_doc", "create_index"]
        }
      ]
    }
  }
}Create Winlogbeat Admin User
Now we need to create the user account that will perform the initial setup. We are going to assign the winlogbeat_setup role to this user. You could use an API key instead of creating a user account, but I wanted to show an alternate method.
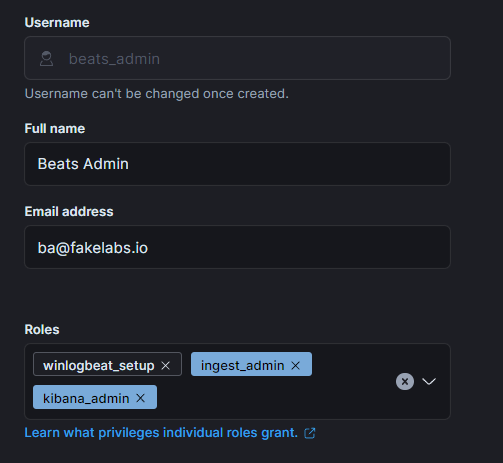
Your user account should have the winlogbeat_setup, ingest_admin, and kibana_admin roles as depicted in the Kibana Web UI screenshot above. Keep the account password handy as you will need that later when we add it to the keystore.
Add CA to Windows Certificate Store
If your Elastic Cluster uses TLS certificates signed by a well-known Certificate Authority (CA) and is bundled with your Operating System, you can skip this step. Likewise, in the event that your cluster uses organizational PKI trusted by all your endpoints, you can also skip this step. These instructions are for those who want to use the default elastic certificates in a home lab, development environment, or have self-signed certificates that do not meet the two conditions at the beginning of this paragraph.
When your winlogbeat agent tries to communicate with the elastic cluster or logstash, the operating system will attempt to validate the certificate. If it cannot, the communication will fail. You will see some TLS related errors, which will most likely be because the CA is not in the certificate store.
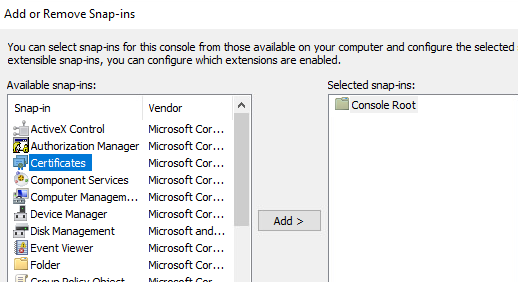
Use the Microsoft Management Console (MMC). Choose File > Add/Remove Snap-ins, then select certificates and add it to the Selected snap-ins.
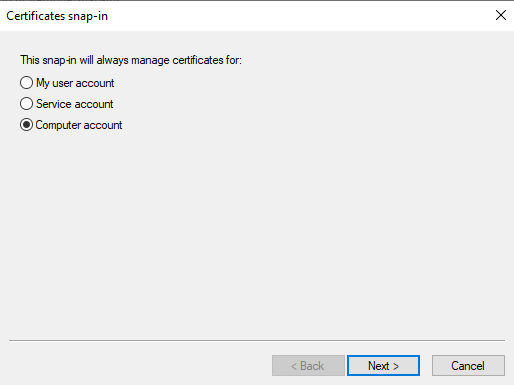
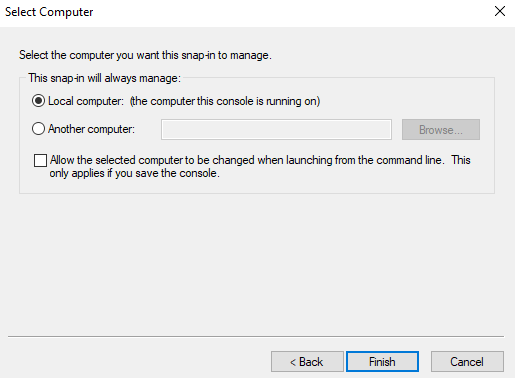
Select Computer account, Local computer, and then click Finish.
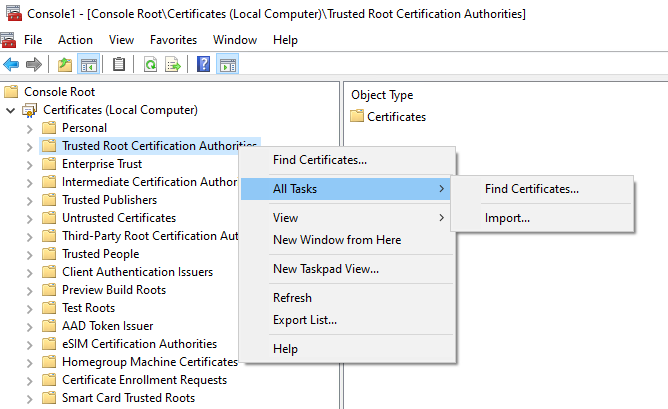
Right-click on Trusted Root Certification Authorities, select All Tasks, and then import your CA certificate. If this is for a non-production environment you can also import the elastic default ca.crt using these same steps. Pleases inventory and monitor certificates you add to the certificate store and promptly remove any that are not strictly required or lack operational value.
Modify Default Winlogbeat Configuration
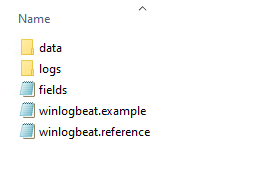
After you install winlogbeat, the configuration files can be found under %SystemDrive%\ProgramData\Elastic\Beats\winlogbeat — you can review the winlogbeat.example file for details about some of the configuration options.
Now we need to create a new configuration file. You can either make a copy of winlogbeat.example and rename it to winlgobeat.yml or use the template I created on my GitHub. The configuration I created incorporates several security strategies from the NSA Spotting the Adversary whitepaper, Microsoft’s Events to Monitor, and the infamous Sexy Six. I have git branches that support both version seven and eight of winlogbeat.
These instructions assume you are using my template, but you can easily adapt them to your own version.
Before we do anything with the winlogbeat configuration file, we need to create two keystore variables to protect our credentials. Keystores are isolated by user account, so make sure you use the same account to create the winlogbeat keystore that you will use when you are ready to start the winlogbeat service.
When you are finished creating the winlogbeat.yml use the following command to create a keystore:
PoSh:> winlogbeat keystore create
Created winlogbeat keystore
Now we can add our credentials. The API key should be a colon-delimited value consisting of the id and api_key values. The encoded value is used with REST API calls using curl on the command line.
{
  "id" : "I5F2Dn8Btzngy0lLkZyW",
  "name" : "blog_example",
  "api_key" : "oTLbdLI9Rg6V_Vloke8Rng",
  "encoded" : "STVGMkRuOEJ0em5neTBsTGtaeVc6b1RMYmRMSTlSZzZWX1Zsb2tlOFJuZw=="
}
So for example the value you should paste from above would be: I5F2Dn8Btzngy0lLkZyW:oTLbdLI9Rg6V_Vloke8Rng
PoSh:> winlogbeat keystore add API_KEY
Enter value for API_KEY:
Successfully updated the keystore
The next keystore credential we need to create is for our admin user that will perform the initial setup:
PoSh:> winlogbeat keystore add BEATS_PASSWD
Enter value for BEATS_PASSWD:
Successfully updated the keystore
In the winlogbeat.yml configuration file, you can only have password authentication, or API key enabled. So while we are working with the former, we need to comment out the latter. Find the username and password fields and set the values accordingly. Remember, we created the beats_admin user beforehand and assigned the relevant roles.
output.elasticsearch:
  hosts: ["elastic.fakelabs.io:9200"]
  protocol: "https"
# only use api OR username/password
  username: beats_admin
  password: "${BEATS_PASSWD}"
#  api_key: "${API_KEY}"
Replace the host values for kibana and elasticsearch with your values. The hostname or IP must match the elastic cluster certificate and be reachable by the endpoint. When all of that is complete, save and exit the file, then run the config check:
PoSh:> winlogbeat test config
Config OK
The configuration test isn’t exhaustive, but it will catch most issues. This next step only needs to be completed once, which is one reason we do not need to give winlogbeat carte blanche permissions.
PoSh:> winlogbeat setup
Overwriting ILM policy is disabled. Set setup.ilm.overwrite: true for enabling.

Index setup finished
Loading dashboards (Kibana must be running and reachable)
Loaded dashboards
Loaded Ingest pipelines
PoSh:>
Open the configuration file again and comment out the user and password and adjust the api_key value:
output.elasticsearch:
  hosts: ["elastic.fakelabs.io:9200"]
  protocol: "https"
# only use api OR username/password
# username: beats_admin
# password: "${BEATS_PASSWD}"
  api_key: "${API_KEY}"
Starting the Winlogbeat Service
Remember that you should start the winlogbeat service using the same account that you used to create the keystore.
PoSh:> Start-Service winlogbeatIf there were no errors, your winlogbeat communicates with elasticsearch using TLS and a constrained API key retrieved from the winlogbeat keystore. There is a troubleshooting guide here if you still have errors or you can leave a comment and I will see what I can do to help.
Thanks for reading.