FreeIPA integration with Splunk
Splunk has built-in user authentication; however, if you have multiple deployments or a clustered environment, it makes sense to utilize centralized user management. FreeIPA provides a solution similar to a Domain Controller in an Active Directory (AD) environment. Setting up FreeIPA is outside the scope of this document, and we will instead focus on how to integrate Splunk user authentication with an existing FreeIPA environment.
Create bindDN user for Splunk Instance
The Splunk server needs a FreeIPA system account (bindDN) to perform LDAP queries and validate user authentication requests. The web UI does not allow configuration of system accounts, so we have to create it from the command line.
From a command-line interface (CLI) on the FreeIPA server, open your favorite editor and create a file (ipa.splunk.ldif) like below, remember to change the settings to match your environment. The uid (splunk) below is the system account name.
dn: uid=splunk,cn=sysaccounts,cn=etc,dc=labs,dc=fakelabs,dc=org
changetype: add
objectclass: account
objectclass: simplesecurityobject
uid: splunk
userPassword: TtBQwrqTD5e!*pt
passwordExpirationTime: 20580119031407Z
nsIdleTimeout: 0
Once you have created the file above, we can add it to our database with the following command:
[root@ipa ~]# ldapmodify -h 10.10.20.3 -p 389 -x -D "cn=Directory Manager" -W -f ipa.splunk.ldif
Enter LDAP Password:
adding new entry "uid=splunk,cn=sysaccounts,cn=etc,dc=labs,dc=fakelabs,dc=org"
Validate the user has been created by using the following command line:
ldapsearch -D "cn=Directory Manager" -x uid=splunk -WIf the account created successfully, you should see output similar to the text below:
[root@ipa ~]# ldapsearch -D "cn=Directory Manager" -x uid=splunk -W
Enter LDAP Password:
extended LDIF
#
LDAPv3
base (default) with scope subtree
filter: uid=splunk
requesting: ALL
#
splunk, sysaccounts, etc, labs.fakelabs.org
dn: uid=splunk,cn=sysaccounts,cn=etc,dc=labs,dc=fakelabs,dc=org
objectClass: account
objectClass: simplesecurityobject
objectClass: top
uid: splunk
userPassword:: k1NTGEE1MTJ9b0pTY0Uzc2xzWjNUa0JZT0hKLExzMWc2V0pVM2Z5OGNLZm4vUGZ
vdkhSDlUrdzk2U3FpWHBAKy9sM27KVzJ3ZVM3d3V0ZE3FSW43Y3Jkcy9RWnRFMGlkSzR5ZWZ5RXox
search result
search: 2
result: 0 Success
numResponses: 2
numEntries: 1
Note: The passwords and hashes are not my actual values
Configure LDAP settings in Splunk Web UI
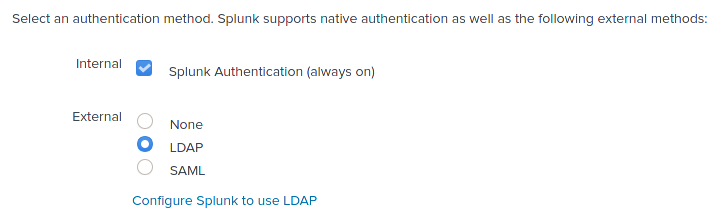
After creating a bindDN system account, we need to configure our Splunk instances to leverage it. Log in to Splunk as an admin user, navigate to user authentication, select LDAP and click ‘Configure Splunk to use LDAP.’
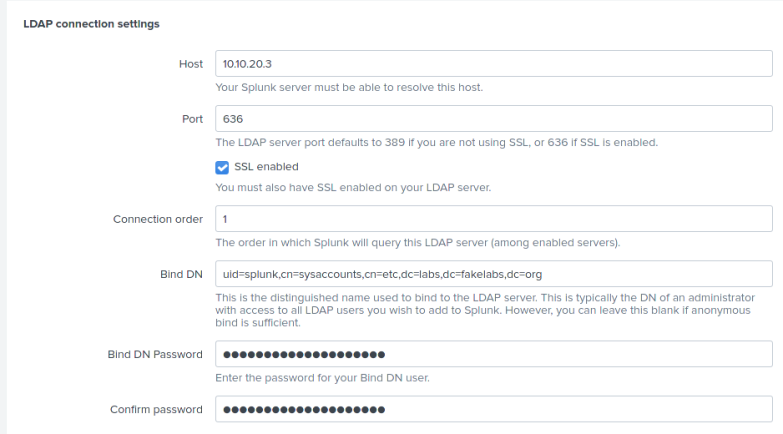
The connection settings should look similar to the image below:
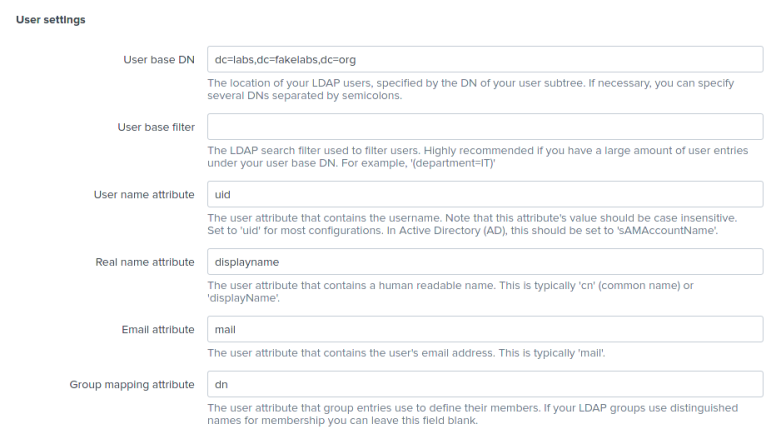
Then modify the user settings:
Modify the group settings according to the image below:
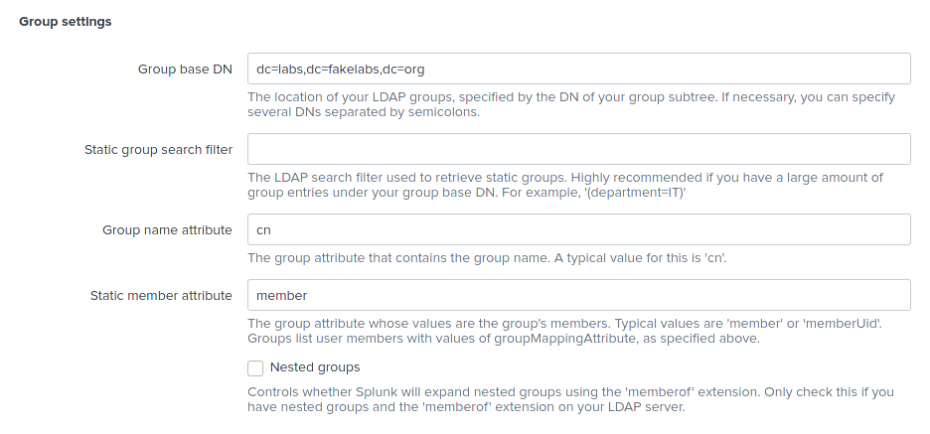
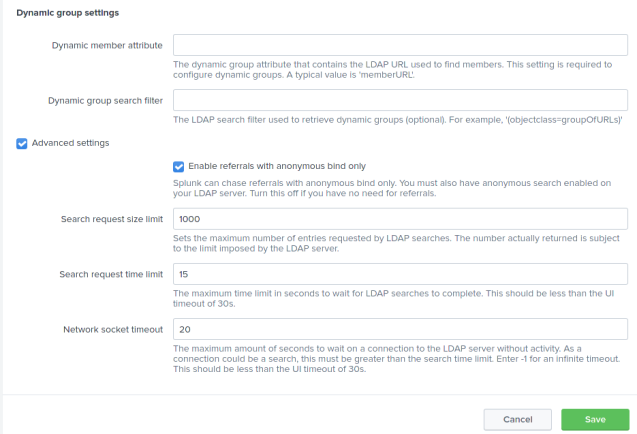
Finally, the image below has the default dynamic group settings:
Configure User Mapping
Create Splunk groups in FreeIPA that will correspond to your Splunk user privileges. The groups you create will not show up in Splunk until you assign those groups to users. For instance, I have the following groups in IPA:
splunk_user, splunk_admin, blue_teamI mapped them as follows:
| FreeIPA Group Name | Splunk Group Name | Username |
|---|---|---|
| splunk_user | user | medie |
| splunk_admin | admin | medie |
| blue_team | power | naruto |
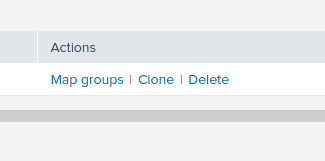
Once you have your FreeIPA groups created, navigate to the ‘Map groups’ action under LDAP Strategies.
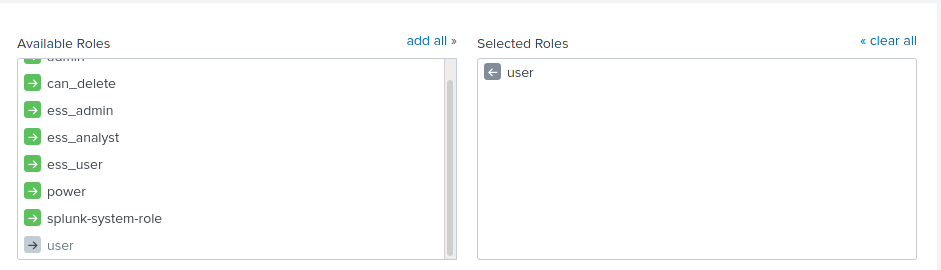
Now you can see a listing of your FreeIPA groups and the Splunk roles associated with them. Click on each IPA group you want to be mapped to a Splunk role and configure it accordingly. If you do not see a group, double-check that you assigned it to a user in IPA. Reloading the LDAP configuration from the Authentication Methods page is another option.

Here is the association screen:
Once you map each FreeIPA group to a Splunk role you can see the listing at a glance as shown below:

The configuration is now complete. Try logging out and log-in as an LDAP user to verify your settings.
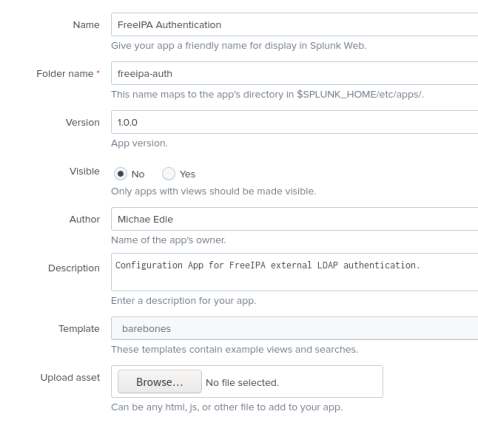
Configure LDAP using Splunk App
Using a Splunk app is my preferred way of modifying external authentication. Use any Splunk UI to create the app template. The generated app can be used as a base whenever you want to create a new app by renaming the folder and modifying the metadata.
Once you save the app, login via SSH and navigate to: $SPLUNK_HOME/etc/apps/
Typically, we would edit files in the local directory, but since we are creating this app, we want to leave the local directory available for overrides. The file to create is authentication.conf, and the contents should be similar to the output below. Update the settings that are appropriate for your setup.
[authentication]
authSettings = FreeIPA-Authentication
authType = LDAP

[FreeIPA-Authentication]
SSLEnabled = 1
anonymous_referrals = 1
bindDN = uid=splunk,cn=sysaccounts,cn=etc,dc=labs,dc=fakelabs,dc=org
bindDNpassword = TtBQwrqTD5e!*pt
charset = utf8
emailAttribute = mail
groupBaseDN = dc=labs,dc=fakelabs,dc=org
groupMappingAttribute = dn
groupMemberAttribute = member
groupNameAttribute = cn
host = 10.10.20.3
nestedGroups = 0
network_timeout = 20
port = 636
realNameAttribute = displayname
sizelimit = 1000
timelimit = 15
userBaseDN = dc=labs,dc=fakelabs,dc=org
userNameAttribute = uid

[roleMap_FreeIPA-Authentication]
admin = admins
can_delete = admins
power = splunk_users
user = splunk_users;blue_teamOnce you have completed editing the authentication.conf, restart the Splunk daemon, and try to log in using an LDAP user account.
You can distribute this app to your search heads or stand-alone instances, and it is a lot faster than using the web UI 🙂
Thanks for reading.