Slackware LVM over LUKS
This is mostly a post to document my process of setting up Full Disk Encryption (FDE) using the Linux Unified Key Setup (LUKS) and the Logical Volume Manager (LVM). Most major distributions already enable this process at installation, however Slackware does not and it must be done by hand. I am going to use an unencrypted boot partition. My boot manager does not currently support booting a LUKS container. Sometime in the future I will consider a rebuild of my laptop using grub2, which has support for LUKS and LVM.
Note: I am going to omit most of the installation steps and focus more on the procedures for getting LUKS/LVM up and running.
Boot the Slackware install media in UEFI mode then check which disks are visible:
root@slackware:/# lsblk
NAME MAJ:MIN RM  SIZE RO TYPE MOUNTPOINT
sda    8:0    0   40G  0 disk
sr0   11:0    1  2.6G  0 rom
The first thing we need to do is to overwrite ALL data on the entire disk with crypto-grade randomness. This will serve to mitigate cryptographic attacks, since it will be difficult to tell the random data from the encrypted data in your LUKS container.
cryptsetup open --type plain -d /dev/urandom /dev/sda erase_diskWarning: Pay close attention to the disk you select, especially if you have multiple attached storage devices. This process will overwrite ALL data on the target disk.
Now fill the container with zeros.
root@slack # dd if=/dev/zero of=/dev/mapper/erase_disk bs=1MDepending on the size of the disk you could be waiting for a while, but this method is significantly faster than using only dd and /dev/urandom to sanitize a disk.

Once it completes close the container.
root@slackware:/# cryptsetup close erase_diskUse gdisk to setup two partitions. The unencrypted EFI boot partition and the LVM partition that will be encrypted. The recommended size for the boot partition varies by operating system, however I usually go with 513MB.
root@slackware:/# gdisk /dev/sda

Command (? for help): n
Partition number (1-128, default 1):
First sector (34-41943006, default = 2048) or (+-}size{KMGTP}:
Last sector (2048-41943006, default = 41943006) or {+-}size KMGTP}: 513M
Current type is 'Linux filesystem'
Hex code or GUID (L to show codes, Enter = 8300): ef00
Changed type of partition to 'EFI System'
Then create the LVM partition using the rest of the disk space.
Command (? for help): n
Partition number (2-128, default 2):
First sector (34-41943006, default = 1052672) or (+-3}size(KMGTP}:
Last sector (1052672-41943006, default = 41943006) or (+-}size{KMGTP?}:
Current tupe is 'Linux filesystem'
Hex code or GUID (L to show codes, Enter = 8300): 8e00
Changed tupe of partition to 'Linux LVM'
Write the changes and exit. Then take a look at the devices.
root@slackware:/# lsblk
NAME   MAJ:MIN RM  SIZE RO TYPE MOUNTPOINT
sda      8:0    0   40G  0 disk
|-sda1   8:1    0  512M  0 part
`-sda2   8:2    0 39.5G  0 part
sr0     11:0    1  2.6G  0 rom
Now setup the encrypted container on /dev/sda2. Use a strong password when prompted.
cryptsetup --cipher aes-xts-plain64 --key-size 512 \
--hash sha512 --iter-time 5000 -v luksFormat /dev/sda2
Open the container so we can setup LVM.
cryptsetup open --type luks /dev/sda2 slackLooking at our devices again we can see our crypt container.
root@slackware:/# lsblk
NAME      MAJ:MIN RM  SIZE RO TYPE  MOUNTPOINT
sda         8:0    0   40G  0 disk
|-sda1      8:1    0  512M  0 part
`-sda2      8:2    0 39.5G  0 part
  `-slack 251:0    0 39.5G  0 crypt
sr0        11:0    1  2.6G  0 rom
First step for LVM setup is to create our physical volume.
root@slackware:/# pvcreate /dev/mapper/slackThen we create our volume group.
root@slackware:/# vgcreate slackvg /dev/mapper/slackThe Common Configuration Enumeration (CCE) recommends creating multiple partitions or logical volumes for system directories such as /tmp, /var/log, /home, etc. This segmentation enables the ability to select restrictive mount options, which helps to mitigate various file system attacks.
I tend to create six logical volumes: root, home, var, tmp, log, and swap
lvcreate -L 12G slackvg -n root
lvcreate -L  1G slackvg -n swap
lvcreate -L 20G slackvg -n home
lvcreate -L  2G slackvg -n var
lvcreate -L  1G slackvg -n tmp
lvcreate -L  1G slackvg -n log
Then format the swap space:
root@slackware:/# mkswap -L swap /dev/mapper/slackvg-swapFormat and install a filesystem. I am using xfs.
root@slackware:/# for i in /dev/mapper/slackvg-{root,tmp,var,home,log};
 do mkfs.xfs $i done
When we take a look at the logical volumes we get:
root@slackware:/# lvs
LV VG Attr LSize Pool Origin
home slackvg -wi-a----- 20.00g
log slackvg -wi-a----- 1.00g
root slackvg -wi-a----- 12.00g
swap slackvg -wi-a----- 1.00g
tmp slackvg -wi-a----- 1.00g
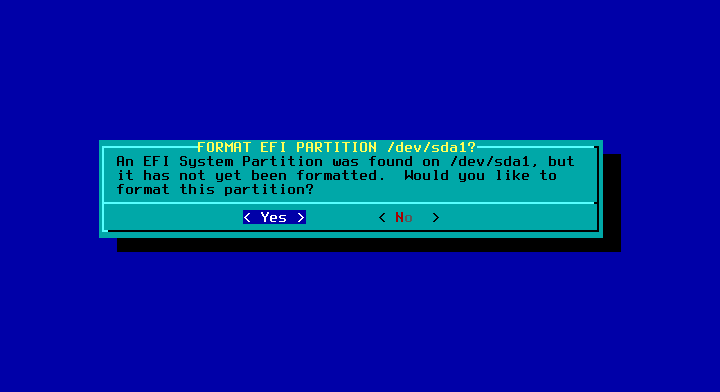
var slackvg -wi-a----- 2.00gNow run setup. If you booted in UEFI mode, then when prompted, skip the LILO install. Then select yes, when the Slackware installer detects and asks to format the EFI partition.
Now finish the installation, but do not reboot. Exit to the command prompt and take a look at our disk configuration.
root@slackware:/# lsblk
NAME               MAJ:MIN RM  SIZE RO TYPE  MOUNTPOINT
sda                  8:0    0   40G  0 disk
|-sda1               8:1    0  512M  0 part  /mnt/boot/efi
`-sda2               8:2    0 39.5G  0 part
  `-slack          251:0    0 39.5G  0 crypt
    |-slackvg-swap 251:1    0    1G  0 lvm   [SWAP]
    |-slackvg-root 251:2    0   12G  0 lvm   /mnt
    |-slackvg-var  251:3    0    2G  0 lvm   /mnt/var
    |-slackvg-tmp  251:4    0    1G  0 lvm   /mnt/tmp
    |-slackvg-log  251:5    0    1G  0 lvm   /mnt/var/log
    `-slackvg-home 251:6    0   20G  0 lvm   /mnt/home
sr0                 11:0    1  2.6G  0 rom
Double check the filesystem types and mount options
root@slackware:/# mount
/dev/initramfs on / type tmpfs (rw)
proc on /proc type proc (rw)
sysfs on /sys type sysfs (rw)
tmpfs on /dev/shm type tmpfs (rw)
/dev/mapper/slackvg-root on /mnt type xfs (rw)
/dev/mapper/slackvg-home on /mnt/home type xfs (rw)
/dev/mapper/slackvg-log on /mnt/var/log type xfs (rw)
/dev/mapper/slackvg-tmp on /mnt/tmp type xfs (rw)
/dev/mapper/slackvg-var on /mnt/var type xfs (rw)
/dev/sda1 on /mnt/boot/efi type vfat (rw)
/proc on /mnt/proc type none (rw,bind)
/sys on /mnt/sys type none (rw,bind)
/dev on /mnt/dev type none (rw,bind)
Notice that our filesystems are mounted under /mnt so we need to chroot before we continue.
root@slackware:/# chroot /mntOnce everything looks correct, it is time to setup our Initial RAM Disk (initrd.gz) to support LUKS, LVM, and XFS. Slackware comes bundled with a script that helps to determine what you need:
/usr/share/mkinitrd/mkinitrd_command_generator.shThe shell script above can get you most of the way there, but I needed to tweak it a bit.
mkinitrd -c -k 4.4.14 -f xfs -r /dev/mapper/luksroot -m xfs -C /dev/sda2 -L -uCopy the initial ram disk to the efi directory and remove the huge kernel, it will not work with a ram disk.
cp /boot/initrd.gz /boot/efi/EFI/Slackware/
cp /boot/vmlinuz-generic-4.4.14 /boot/efi/EFI/Slackware
rm /boot/efi/EFI/Slackware/vmlinuz
cd /boot/efi/EFI/Slackware
mv vmlinuz-generic-4.4.14 vmlinuz
Edit elilo.conf to reflect your use case:
chooser=simple
delay=18
timeout=120
#
image=vmlinuz
        label=vmlinuz
        initrd=initrd.gz
        read-only
        append="root=/dev/mapper/luksroot vt.default_utf8=1 vga=normal ro"
Now when you reboot you will be eventually prompted for your password to unlock your LUKS container.
When you upgrade the kernel, generate a new initrd.gz and copy the new kernel and initrd to
/boot/efi/EFI/SlackwareModify elilo.conf to reflect the new kernel. Keep the old kernel around until a successful boot with the new kernel.
Thanks for reading.