Mounting NFS Shares in Windows Using Identity Mapping

Before we begin let us enable Services for NFS and both Sub Features.

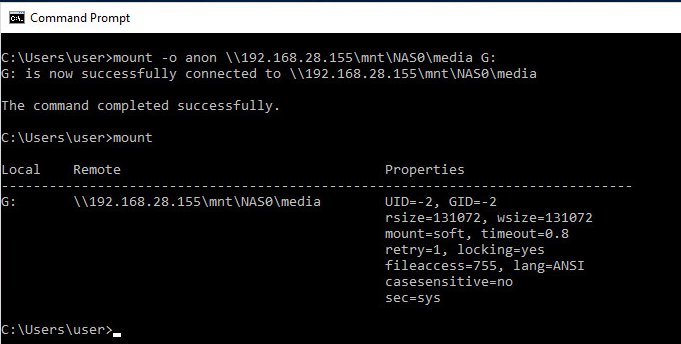
The typical way you will see an NFS share mounted in Windows involves mounting the remote file system using the anonymous (anon) user:

mount -o anon \\192.168.28.155\mnt\NAS0\media G:

This will give you read only access based on the configured permissions of the NFS Share.

Note:  The UID/GID value is -2 and locking=yes

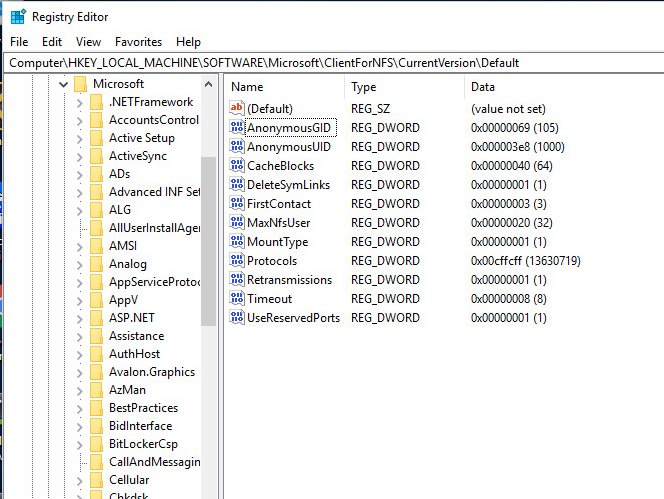
If you want read/write access then you have to add two DWORD Registry Keys with the UID and GID of the Unix user that owns the share.
Launch an administrative PowerShell Terminal.

New-ItemProperty HKLM:\SOFTWARE\Microsoft\ClientForNFS\CurrentVersion\Default -Name AnonymousUID -Value 1000 -PropertyType "DWord"
New-ItemProperty HKLM:\SOFTWARE\Microsoft\ClientForNFS\CurrentVersion\Default -Name AnonymousGID -Value 105  -PropertyType "DWord"
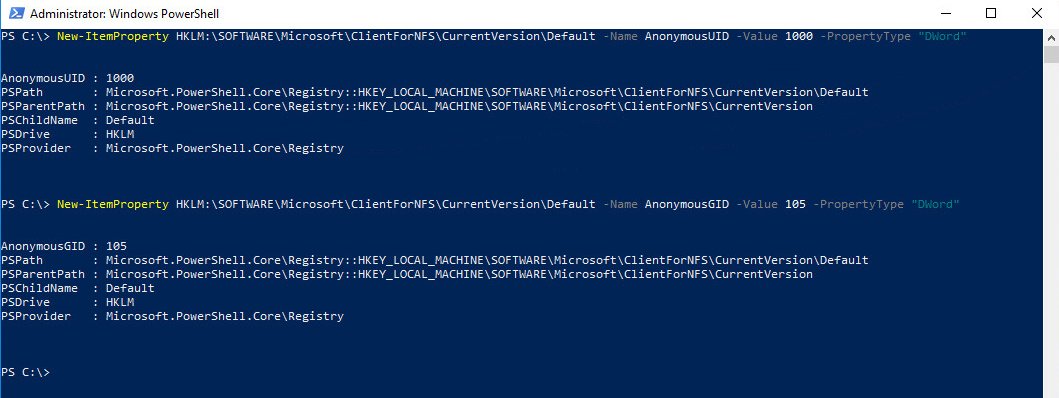
Reboot.

Restart-Computer -Force


Now mount the NFS Share again

mount -o anon nolock \\192.168.28.155\mnt\NAS0\media G:

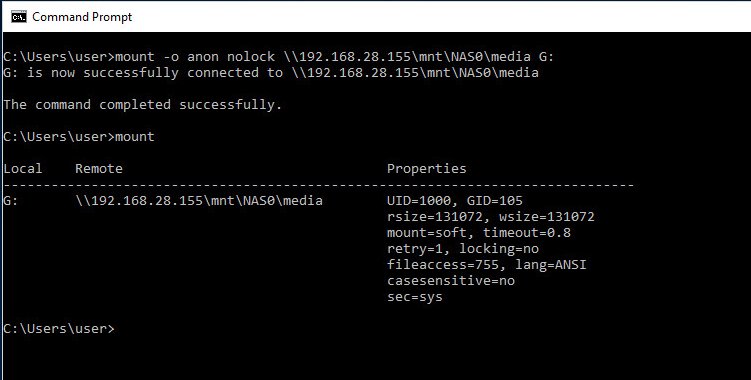
Most people are apt to stop here since it works. However, any user on the system can mount this share and  will have read/write access to that network resource.

In order to enhance our security posture we could use one of several Identity Mapping mechanisms to better secure our interactions with NFS shares. Utilizing the local passwd and group files is one of these mechanisms and does not require an additional server or active directory integration. The location for these files are:

C:\windows\system32\drivers\etc\passwd
C:\windows\system32\drivers\etc\group

The format should be:

passwd: [domain]\<UnixUser>:x:<UnixUID>:<UnixGID>:Description:C:\Users\<UnixUser>
 group: [domain]\<UnixGroup>:x:<UnixGID>:<UnixUID>

Here are the contents of both files in my lab VM:

C:\Windows\System32\drivers\etc> type passwd
mechanic:x:1000:100:Windows User,,,:c:\users\mechanic

C:\Windows\System32\drivers\etc> type group
wheel:x:0:0

Once these files exist and have valid entries Windows will use them and map permissions to the correct user only. Remove the AnonymousUID/GID registry entries if you created them and make sure you have Services for NFS and the two sub features, Client for NFS, and Administrative Tools enabled.

Then the process is as simple as mounting with the nolock option.

mount -o nolock \\192.168.28.155\mnt\NAS0\media G:


If it didn’t work for you double check the following:

  1. NFS Share UID and GID match what you have in the passwd and group files on the windows machine.
  2. You have removed the AnonymousUID and AnonymousGID entries in the registry
  3. You didn’t skip the rebooting part
  4. When you have the passwd and group files in the correct location you do not use the ‘anon’ option with mount.


Thanks for reading.

14 thoughts on “Mounting NFS Shares in Windows Using Identity Mapping”

  1. It worked for me (readonly) when I used the registry keys but told me I didn’t have permissions once I used etc/passwd and etc/group. I don’t quite understand how one authenticates to the synology NFS (non-windows) when you’re using these methods.

    Reply
    • jar349, I do not own a Synology so I can’t properly test a solution, however, the UID/GID you use in the passwd and group file on the Windows machine must contain the UID/GID of the user on the Synology box. Then remember to remove the Anonymous* registry keys.

      Reply
  2. How about the other direction – configuring a Linux client to connect to a Windows server running NFS Server?

    Reply
    • Not something I use personally, but it would be like connecting to any other NFS Server. I’ll consider adding it to my queue. Thanks for the feedback.

      Reply
  3. Hello – I have done extensive testing with the Win 10 native NFS client with a non-Microsoft NFS Server. The file does work if updated correctly, and the file appears to be ignored. Also note that when updating the file, make sure to use Windows userids that exist and ensure no blank lines are at the bottom of the file or Windows 10 will ignore and map you to the anonymous UID/GID. Also remember that after any changes to are made, you must either re-boot the Win 10 machine or bounce the native NFS client process in an Administrative DOS window:

    1) Make sure to umount any attached NFS network drives first
    2) nfsadmin client stop
    3) nfsadmin client start

    ~Charlie

    Reply
  4. for me only the anon solution works. Windows ignores the passwd and group files.
    I customized them as far as I could understand the description:

    C:\Windows\System32\drivers\etc>type password
    adslocal\g508031:x:1004:1004:Heidrich Attila,,,:c:\users\g508031

    C:\Windows\System32\drivers\etc>type group
    adslocal\g508031:x:1004:1004

    also tried without domain, also adding -u:g508031 to mount CLI

    Reply
    • Attila, you have to remember to remove the registry entries:

      Remove-ItemProperty HKLM:\SOFTWARE\Microsoft\ClientForNFS\CurrentVersion\Default -Name AnonymousUID
      Remove-ItemProperty HKLM:\SOFTWARE\Microsoft\ClientForNFS\CurrentVersion\Default -Name AnonymousGID

      Also double check that you matched the uid/gid that owns the share and it is the same as in your passwd/group files.
      If all of that is good then make sure you didn’t accidentally include the anon option when you mounted.

      I created a brand new Win10 VM and it all works as long as my uid and gid in the file matches the user and group on the NFS Server.
      I’ll update the blog to reflect the removal of the registry entries more clearly and the gotchas.

      Reply
      • I have tested the Win 10 native NFS client extensively with a non-Microsoft NFS server. I have found that updating the client “passwd” file works well, and the “group” file appears to be ignored. Also make sure that every Windows userid listed in the passwd file exists, and that there are no blank lines exist in it, or Windows 10 will end up ignoring this file too and you will be assigned the Anonymous UID and GID mapping. Also, whenever updating the passwd file, you will need to either reboot the machine or restart the Win 10 native NFS client using the following administrative commands:

        nfsadmin client stop
        nfsadmin client start

  5. Has anyone actually gotten the c:\windows\system32\drivers\etc\group file to work to a non-windows NFS server? I cannot get supplemental group membership to work going across the wire fron Win 10 NFS client -> non-MSFT NFS Server.

    From a non-domain-joined Win 10 machine, I see nothing in the Win 10 Wireshark trace for extra GIDs, always see

    “Auxiliary Gids(0)”.

    I still need to try a domain-joined machine.

    I used the EXACT specifications as laid out above in the file.

    Thanks for any advice!

    Reply
    • I updated the post to show an example of how you fill out the passwd and group files. The example before was just a template and would not work if you used it EXACTLY as it was shown. Thanks for allowing me to see that I needed to make that more clear.

      Reply

Leave a Reply to No OneCancel reply

This site uses Akismet to reduce spam. Learn how your comment data is processed.

Discover more from Michael Edie

Subscribe now to keep reading and get access to the full archive.

Continue reading